symbol to specify the
format of the active field. The background of the mask is can be displayed in
any colour. You change the colour settings via the Colour function in the
menu bar.
symbol to specify the
format of the active field. The background of the mask is can be displayed in
any colour. You change the colour settings via the Colour function in the
menu bar. The Mask Editor enables you to create HELiOS masks for input and search masks for documents, articles, folders, classifications, pipe classes and own object types.
The edit functions work in the same way as the common Windows functions.
You can activate the Mask Editor
Your Windows system will prompt you to run the program as Administrator. Proceed as follows:
The selected masks will be opened. The masks consist of individual fields
which can be placed arbitrarily within the mask. The active field is highlighted by a frame. Click the
symbol to specify the
format of the active field. The background of the mask is can be displayed in
any colour. You change the colour settings via the Colour function in the
menu bar.
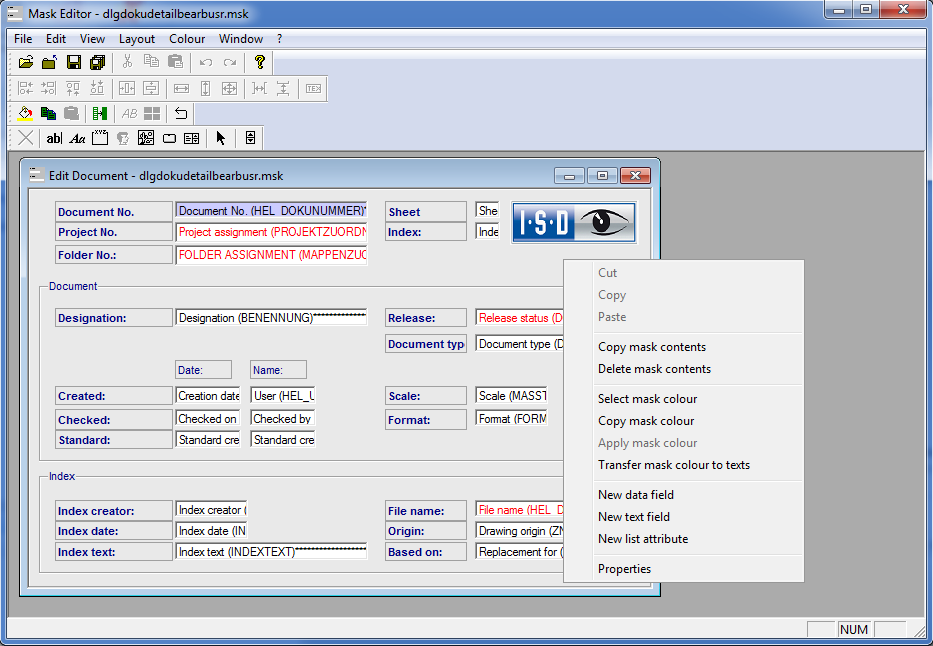
Right-click to open the context menu with the editing functions.
|
Function |
Description |
|---|---|
|
Copy mask contents |
Copies the complete contents of the mask, i.e. in order to create a new mask with similar contents. |
|
Delete mask contents |
Deletes the complete contents of the mask. |
|
Select mask colour |
Allows you to specify a mask colour. |
| Copy mask colour |
Copies a mask colour. |
| Apply mask colour |
Applies the background colour to the mask. |
| Transfer mask colour to texts |
Transfers the mask colour to texts. |
|
New data field
|
Use this function to insert a new data field. Data fields are linked to an attribute and are used for the input of texts. Select an attribute and activate Next .... The Properties window enables you to specify various settings concerning the data field, such as field height, field length, text length, text colour or background colour. You are also asked to enter the permitted characters for the current data field here.
The new field appears in the mask and can be placed arbitrarily. |
|
New text field |
Text fields are used for the description of data fields. The new field appears in the mask and can be placed arbitrarily. |
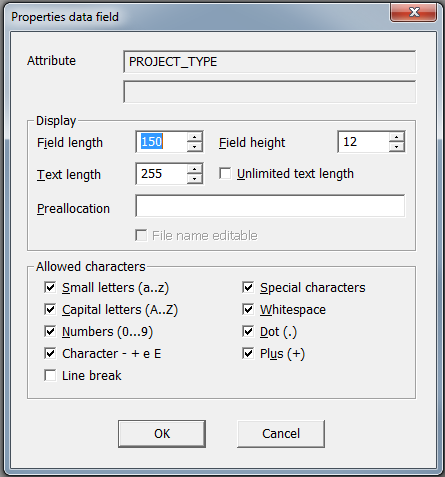
If you right-click a data field and select Properties in the context menu, a dialogue with setting options for the attribute values will be displayed:
Here you can specify text length, text height, as well as an optional pre-allocation for the data field.
If you activate the Unlimited text length checkbox, the number of characters that can be entered in the field will no longer be limited.
If you activate the Line break checkbox, you can create line breaks while entering text by pressing the ENTER key.
For some data fields (e.g. HEL_DATEINAME) you can deactivate the File name editable checkbox. If you do this, the Allowed characters options will be greyed out and cannot be activated or deactivated. This will prevent an editing of the field in the HELiOS Desktop, i.e. the field will become a read-only field.

Related Topics
|
Version 2102 - HELiOS | Date: 15/11/2016 | © Copyright 1994-2016, ISD Software und Systeme GmbH |